Refitting and restoring a 47-year-old Irwin Citation 34 sailboat. Originally, this blog was created to motivate myself to continue this challenging project. It documents the DIY work step by step, done almost entirely single-handed.
My goal is to make the boat seaworthy again, return her to salt water and sail. Sail more and sail seas.
Search This Blog
Engine - Fresh water cooling
2QM20 Conversion to Freshwater cooling on my IC34.
Before even think about conversion I have checked water passages in the engine head and block and confirmed there no calking or corrosion.
I
DID NOT USE original Yanmar parts for 2QM20F engine due to they are VERY hard to source
and as result prohibitive expensive and almost impossible to fix in
reasonable time if some component fail. (Only exception only is the heat exchanger was built by Mr.Cool Marine)
40" is goog, but likely 42-43" will be much easier to install. Now to put new belt i need to pray it and tun engine or take water pump pulley off and put it in.
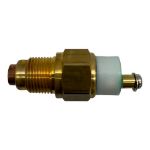
BSPT 3/4 to 1" hose barb adapters to replace original water ports to change hoses to 1" diameter to provide as much coolant flow at pump can do. Original 5/8 hoses are too small and may result engine spot overheating and as result too much thermal stress on engine block and head.
1" heater hoses with 90 degrees elbows in fresh water cycle.
Custom parts made:
Flat front engine head cover, 12mm steel.
Original part used as template.
Temperature alarm sensor hole position is based on space available On Water pump mounting plate.
Water pump mounting plate/pump base 12mm steel.
Plate made using lexan template I used to tune up pump position.
pump mounted the way the output port oriented to cylinder block water input. One of studs common with front engine head lid mount holes. V-belt path checked and it has about 10mm clearance from fresh water pump body (I will need to keep eye on belt tension.
Plate made and all surfaces painted but under the pump. Opening intended to let overheat alarm sensor to be installed.
On the engine plate mounted on 3 studs keeping front engine head lid.
Alternator tentioner plank, 6mm steel. Cut in size, design i ordered from send-cut-send was straight, but when i start fitting it I found it colliding with the bolt on the pump, so I had to to forge it. I heated it to hot red and forged to shape. In flat plane and then if vertical plane to align with alternator plane.
Heat exchanger mount bracket, 3/16" steel (welded).
Mount plate made to make surface to mount heat exchanger at the engine, next to exhaust manifold. bracket connects M6 mounting points originally used for fuel filter and bolt holding raw water thermostat housing.
On engine fuel filter mount, 3/16" steel (welded) (fuel filter mover 4" down to free space for exchanger.
To provide more space for heat exchanger I decided to move on-engine filter 4" lower. To do it i made custom bracket .
will be mounted to exhaust manifold using existing bolts keeping front lid on place. Bolts replaces on longer ones and washer added in between bracket and manifold.
Cooling Water "manifold"
Custom tubing made from 3/4 copper pipe to join heat exchanger, Thermostat and fresh water pump input.
Assembly
Replace front engine head lid with flat one.
Replace Water ports
Mount water pump
Install pulley and belt.
Belt i sourced is 40" length, Likely,
42-43" will be much easier to install. Now to put new belt i need to
pray it and tun engine or take water pump pulley off and put it in.
Bolts on exhaust manifold replaced with studs to get fuel filter bracket on. Washers added between bracket and lid.
New fuel filter bracket and filter installed. Fuel lines replaced to shorter ones.
Original, raw water thermostat removed from the housing and mounting bracket for heat exchanger installed to place.
Thermostat and Coolant distribution manifold installed
Connecting heat exchanger
UPDATES
Coolant manifold replaced with T connector
[update] custom water manifold replaced with T connector, it gave me an inch to lower thermostat and top hose.
Engine runs
Heat exchanger
During installation I found a problem - heat exchanger inlet appears have no access and i had to
mount heat exchanger independently from the engine.
Little longer hoses but much better access to heat exchanger.
Manual starter (finished)
Manual starter installed and tested on the boat.
I installed bearing block in the engine room wall
Instead of building whole handle I made adapter which utilities standard
sailboat winch handle. Two problems where solved: how to make handy
handle and how then store it.
Winch handle adapter
Handle attached to engine
Starter in action
Long time run
So far I have about 15 hours after engine was switch to fresh water cooling.
Some people said it is good, some said it will kill engine instantly.
So far engine works, Zero issues observed so far.
I used it several times for an hour or so at cruise RPM ~2000.
2/13/26 we did motored 5 hours non stop 2000-2200RPM. Engine found thermal equilibrium at about 76C coolant temperature out, 70C after heat exchanger water went back to engine block. No signs of overheat.


 will be mounted to exhaust manifold using existing bolts keeping front lid on place. Bolts replaces on longer ones and washer added in between bracket and manifold.


 New fuel filter bracket and filter installed. Fuel lines replaced to shorter ones.
 Original, raw water thermostat removed from the housing and mounting bracket for heat exchanger installed to place.
 Thermostat and Coolant distribution manifold installedConnecting heat exchanger


 Instead of building whole handle I made adapter which utilities standard sailboat winch handle. Two problems where solved: how to make handy handle and how then store it.


Comments
Post a Comment